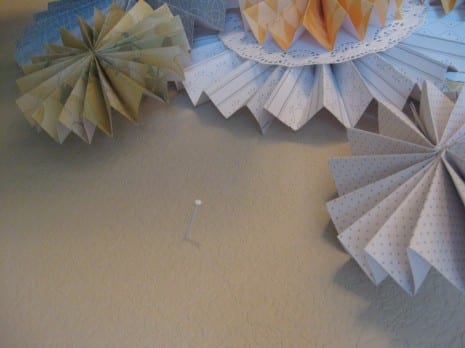
Ali P made this paper wheel backdrop for her Let’s Go Nuts Dinner Party and when I posted a photo of it on Facebook, the response was incredible. People kept wanting to know how she did it.
Well, Ali kindly put together this tutorial for us, so thank you, Ali! Now take it away…
Making a wall of wheels, or paper rosettes, is a great way to make a HUGE impact at a party without a lot of fuss or cost. I bought a pack of paper and some doilies – that’s it! Here’s a basic tutorial on how to make this great back drop.
Supplies
- Scrapbook paper or card stock
- Doilies
- Stapler
- Glue gun

1. To make a large wheel; fold 3 sheets of paper accordion or fan style,

2. Fold each fan in half and staple edges together.


3. Next, staple all three folded fans to each other to complete your wheel.


4. For a smaller wheel you fold 1 sheet of paper into a fan. Cut it in half.

5. Fold those halves in half again and staple. You only need 2 sections to make a circle for this smaller wheel.


6. You can leave the large and small wheels plain or stack them with a doilie for added effect. I hot glued all the layers for the stacked rosettes.


7. I added my wheels to my wall by poking them through with nails. If you can’t put nails in your wall, I’ve seen it done by using hot glue to attach them to a large poster board or foam core board.

8. Add as many as you want to the wall and layer with different sizes and papers.
I hope this helps! I’m sure I’ll use this party backdrop trick again and again.
Thank you, Ali, for taking the time to put this tutorial together. But what did you do with the holes in your wall when you were all done? 🙂
If you haven’t seen the rest of Ali’s amazing party, please check it out. And to learn more about Ali and see all her beautiful parties, please visit her blog, Sprinkles of Charm.

16 comments
Susie wrote:
i absolutely LOVE IT!! thank you SOO much for this tutorial! I'm DEFINITELY gonna use these beauties for my Daisy-theme baby shower! Oh, I can't wait to start picking papers & making them! Thank you SOOOO much!!! <3
Joy wrote:
Thank you so much. I am going to use this idea for our church Christmas party in the gym. It is so difficult to decorate such a large space with limited funds to spend. This will require some time, but will be fun to get a committee together to work on it.
Ashleigh Dorfman, CSEP wrote:
Fantastic! Thank you for sharing this tutorial. Now I know the secret of making larger wheels!
Mindy wrote:
ooh thanks for the tips!
Estreia wrote:
Thanks for the tutorial! Easy directions to follow so I will be making them for our next party. :)
Bri wrote:
How do you put the rosettes onto the wall? Do you have to use nails?
Alissa wrote:
Bri, I have found that the blue poster hanging wall tack (a clay-like substance found at most craft stores) is working well for my pinwheels so far. I'm not so sure how it will work with a heavier stock crafting paper, though. Good luck!
monica wrote:
Great tutorial. You guys just gave me a great idea to work on this Saturday
Deb wrote:
I'm going to make this back drop for my mother-inlaws Bat Mitzvah. Can't wait to see how it turns out. Thanks so much for the tutorial!
Luci wrote:
So beautiful! Cost effective too! I made the same back drop for a friend's wedding reception. Its huge in measurement with 5 x 7 and its all in variety of plum fushions, golds, & ivory colors! Its absolutely one-of-a-kind!
Lisa wrote:
I LOVE It. I just made one for my daughters apartment for college. Her colors in her room are yellow, gray, and white! After I made all the dif. pinwheels I hot glued them onto an old discounted frame that I found at a craft store. It didn't have the glass. (it did have the cardboard back)
Cecille O wrote:
Can I use it for business if possible? Thanks much! :)
Nicole S wrote:
What is the measurement for the accordian folds? And is this using 12x12 scrapbook paper?
Spost B wrote:
This web site is really a walk-through for all of the info you wanted about this and didn’t know who to ask. Glimpse here, and you’ll definitely discover it. http://teamsportbanners.com/soccer-banner/hem-grommets-banners.html
Maika L wrote:
I was really impressed, you are very handy, thanks for guiding it so simple
Adriana R wrote:
I plan on making this for all the food / gift tables for my Harry Potter themed bridal shower! I can't wait to get started! I plan on attaching to a poster board of some sort since we aren't allowed to tape anything directly to walls or hang anything from the ceiling.
To leave a comment Log in -or- Join the party