Party decorations are what bring a party to life, and if yore like me and love making your own decorations, you won’t want to miss this gorgeous glam sequin monogram letter DIY.
This craft, created by Kristen and Missy from Sweetly Chic Events & Designs, is a great addition to a glam party and will look fabulous at a baby shower, 1st birthday, bridal shower, or even as decor for a girl’s bedroom.
I love making these to adorn a table with at a glam-themed birthday party like this one or even to a New Year’s Eve Party to spell out the new year.

Monograms are a classic trend that never goes out of style! We decided to bring an element of glitz and glam to a traditional monogram by simply adding sequins for that bling factor.
This quick and easy DIY will be sure to dazzle at your next party or bring some finesse to your home decor! Download your FREE Printables for New Year’s Eve.
Remember, we have so much inspiration on offer if you’re looking to throw a party – like this list of ideas for a 30th birthday or this one for 50th birthday theme ideas for 2023.
Contents
Why You’ll Love These Monogrammed Sequinned Letters
- They personalize the whole scene: You can choose the letter you want to use and decorate it with sequins in your favorite color.
- Sparkle and shine: Sequins add a touch of sparkle and shine to any craft project, especially for an Easy Sequin Monogram Letter.
- Easy to make: Another reason to love this craft is that it is relatively easy to make.
- Versatility: This craft can be used in various ways, making it a versatile addition to your home decor. You can hang it on the wall, prop it up on a shelf, or even use it as a centerpiece.
- Creativity: This craft allows for creativity and experimentation with different color combinations and patterns, making it a fun and engaging activity.
- Relaxing: The process of attaching the sequins to the letter can be a relaxing and meditative activity, providing a sense of calm and tranquility.
- Unique gift idea: An Easy Sequin Monogram Letter is a thoughtful and unique gift idea for friends and family. You can customize the letter and sequin colors to match the recipient’s style and personality.
Supplies
To create an Easy Sequin Monogram Letter using elastic sequin cording, a Paper mache letter, a decorative flower, a hot glue gun, and scissors, you will need the following supplies:
- Elastic sequin cording
- Paper mache letter of your choice
- Decorative flower (optional)
- Hot glue gun
- Scissors
Note: The amount of elastic sequin cording needed will depend on the size of the paper mache letter used. A larger letter will require more cording, while a smaller letter will require less. Be sure to have enough cording to cover the entire letter.
Learn How to Make an Easy Sequin Monogram Letter

Step 1: Cover the edges
We want to start by covering up the edges of the letter.
Take a strand of your elastic sequin cording and carefully cut pieces to adhere to the edges of your paper mache letter that cannot be wrapped with the elastic.

Step 2: Adhere the strands
With your hot glue, adhere the strands of your pre-cut elastic to any edging of the perimeter of your paper mache letter.

Step 3: Wrap the sequin band
Starting at any edge of your paper mache letter, hot glue the end of your cording (starting on the back of your letter) and begin to carefully wrap the sequin band around it.
Be sure as your wrap, there are no gaps between the layers of the cording.
If you have some small gaps, you can easily fill them in with loose sequins.

As you get to a new edge of your letter, you may need to start wrapping the cording in the opposite direction.
Of course, this depends on the letter you are working on.

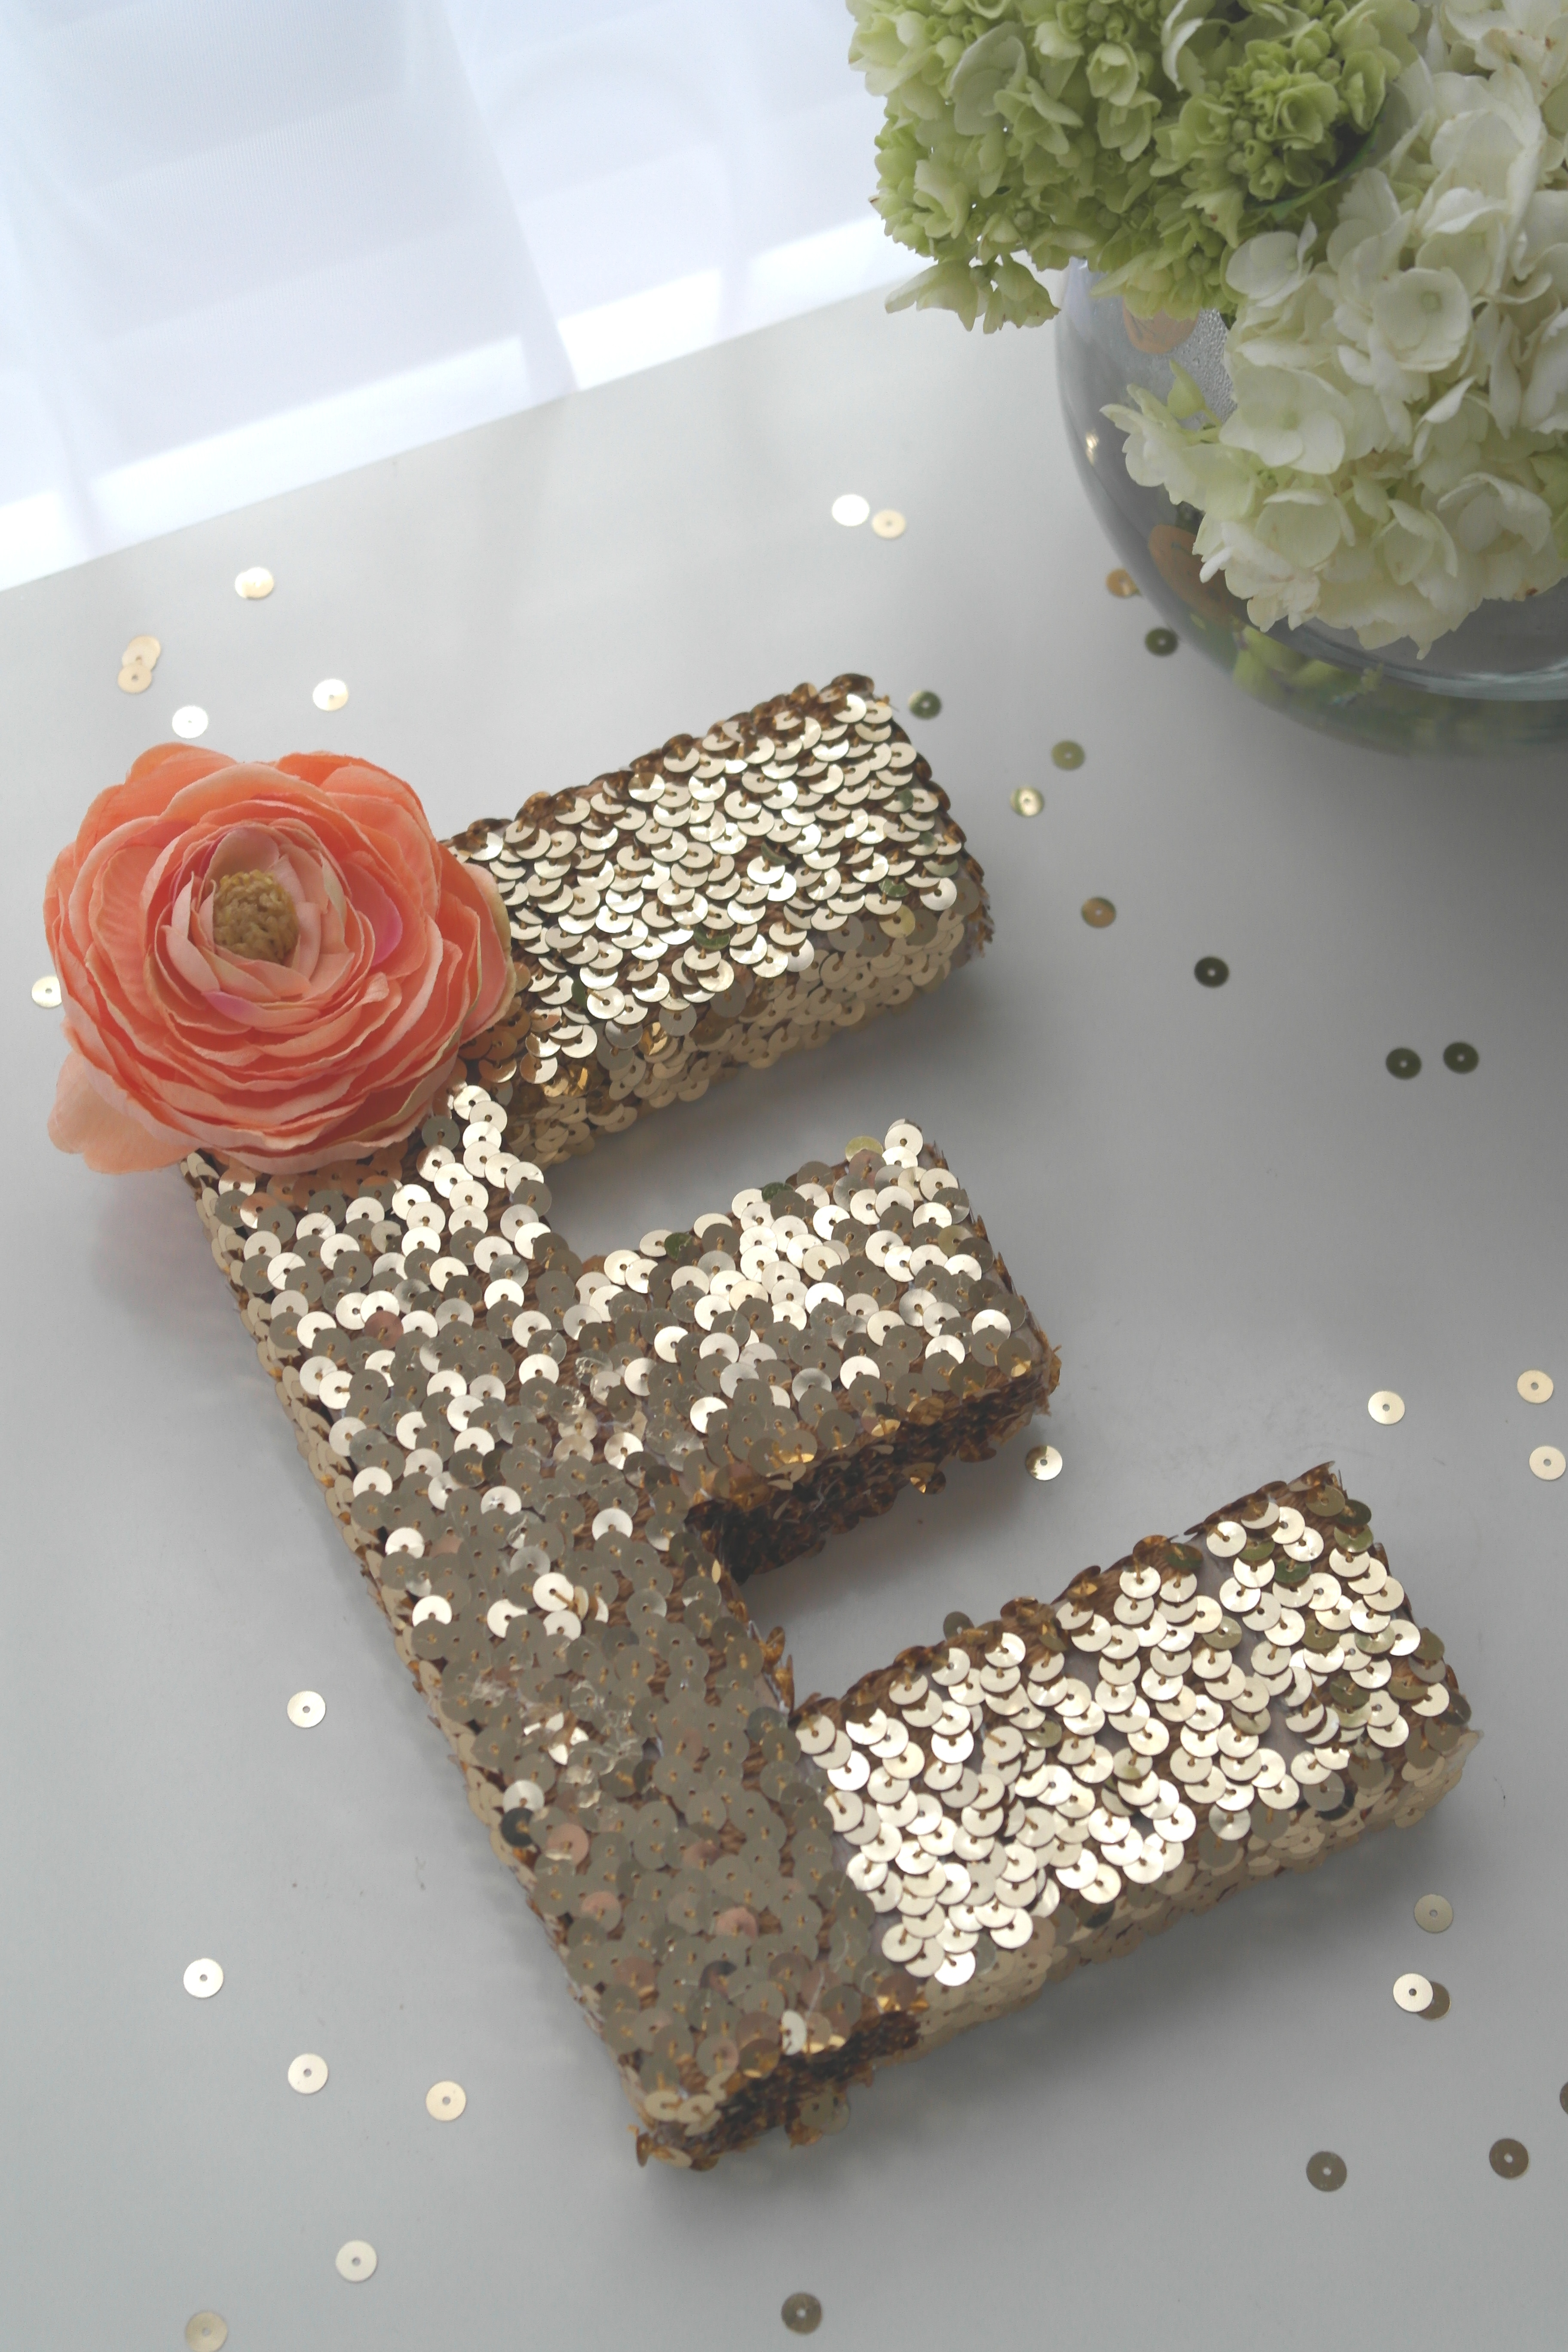
We wrapped our sequins vertically along the outer edge of our letter ‘E’ to save on time and to give it a smoother look.

Step 4: Finish wrapping
Finish wrapping any other areas of your letter.
You should be left with a fully covered letter!

We wanted to add a little extra something to our monogram, so we decided to add a pretty coral-colored silk flower for a fun detail!

Carefully adhere your silk flower with a touch of hot glue.


Thank you, Missy and Kristen, for sharing your boundless creativity! I would never have thought to use sequin cording… wonderful idea!
To learn more about Missy and Kristen, please visit them at Sweetly Chic Events & Designs and on Facebook, Pinterest, and Instagram.
Tips and Substitutions
- Cut the Cording Carefully: When cutting the elastic sequin cording, be sure to use sharp scissors and cut the cording at an angle. This will help prevent the sequins from falling off and give you a clean cut.
- Secure the Cording: To prevent the cording from slipping or moving, use a hot glue gun to secure it in place. Apply a small amount of glue to the letter, press the cording into place, and hold it until the glue dries.
- Sequin Cording: If you can’t find elastic sequin cording, you can use regular sequin trim instead. You can also use other types of decorative cording or ribbon to create a different look.
FAQs
You can use a wooden or foam letter as a base for your project. Just be sure to choose a sturdy base that can hold up to the weight of the sequin cording.
Yes, you can use any type of sequin ribbon you like, as long as it is flexible enough to be easily applied to the letter.
The time it takes to make sequinned monogram letters will depend on the size and complexity of the letter, as well as your experience and skill level. However, on average, it can take between 1-3 hours to complete a single letter.
Need More Party Craft Decor Ideas?
Decorative Elements: Instead of using a decorative flower, you can use other types of embellishments, such as rhinestones, buttons, or beads. Just be sure to choose elements that complement the sequin cording and enhance the overall look of the project.
- DIY Tutorial From A Catch My Party Member – How to Make A Tissue Paper Monogrammed Letter
- Make an Easy Yarn-Wrapped Ombre Monogrammed Letter!
- Monogram Floral Centerpiece
- Flower Monogram Letter
- Glitter Party Utensil DIY
For more glitzy inspiration, check out these glam parties from our site, and these additional glam party supplies from vendors with listings on Catch My Party!

Equipment
- Elastic sequin cording
- Paper mache letter of your choice
- Decorative flower (optional)
- Hot glue gun
- Scissors
Instructions
- We want to start by covering up the edges of the letter.
- Take a strand of your elastic sequin cording and carefully cut pieces to adhere to the edges of your paper mache letter that cannot be wrapped with the elastic.
- With your hot glue, adhere the strands of your pre-cut elastic to any edging of the perimeter of your paper mache letter.
- Starting at any edge of your paper mache letter, hot glue the end of your cording (starting on the back of your letter) and begin to carefully wrap the sequin band around it.
- Be sure as your wrap, there are no gaps between the layers of the cording.
- If you have some small gaps, you can easily fill them in with loose sequins
- As you get to a new edge of your letter, you may need to start wrapping the cording in the opposite direction.
- Of course, this depends on the letter you are working on
- We wrapped our sequins vertically along the outer edge of our letter ‘E’ to save on time and to give it a smoother look.
- Finish wrapping any other areas of your letter